Web redirect
New work, news and Images from the shop. If you would like to know more about my art, please visit my full website @ www.chrisbathgate.com
3/30/11
An Experiment in Scaling
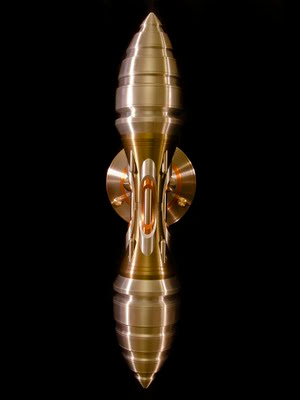
Here are the images for what I am going to consider a trip-tic. I already posted about the last edition, but I was kind of taken with the proportions of that design and I wanted to explore them further with a more ambitious work. My first instinct was to make a larger version and expand on the concept and see where it lead me, But while I was at it, I figured I could go the opposite direction as well. So in short, I made a small set of 1/2 scale works along with a Larger "one of a kind" that is 2.3 times as large as the original. Both with design changes that I found appropriate for the different scales.
The Small Version
The 1/2 scale version is quite similar to the original with some simplification of the design to account for scale. But this one was a much more of a process oriented experiment. I took this redesign as an opportunity to play with some process elements that I rarely ever have the opportunity to think about.
When making one of a kind works and short run objects, you rarely get to play with optimizing your processes to make them more efficient and more elegant. Designing a program and its associated set ups and operations to cut a shape can be done many ways, But when you get a second chance to simplify an object, you get to indulge in taking the time to streamline the programs and improve on the different operations based on what you learned doing it the first time. So yeah it was kind of a chance to nerd out on my craft a bit, but I got a lot out of it and now I have a bunch of these little guys to offer. I was able to shorten the production time significantly.
The Large Version
So when you double the size of a particular shape, you actually increase its volume and its mass by 8 (twice as big, 8 times as heavy). Strangely enough, this ratio also seems to hold true for the amount of time it takes me to make the work itself, but I think that is less scientific. The design changes for the larger one were both practical, and aesthetic.One of the more practical changes when making this one was to replace the use of stainless steal in the end caps with Aluminum. It would have been impossibly heavy otherwise and prohibitively expensive to make, Aluminum was the lighter cheaper choice. On the other hand it allowed me to do a much more complex turning operation as Aluminum is much easier to machine.
On the aesthetic side, I did a number of things, I added a number of new details that expanded on the central theme. One of the main things was to add a third layer to the peeled back center details. This required a serious set up to drill the over 8'' deep holes straight enough to make the detail work. Here is a picture of me drilling the bores on the Center peace.
And another shot of the seriously large drills that I had to use. I was really pushing the limit of what would fit on my machines, Not to mention doing something I had never done before with an obscenely expensive peace of bronze, so I was very careful to limit the chances for mistakes by setting up an indexed plate with alignment pins that I could mount the work too. I drilled holes into the bronze that registered to the plate so I could remove it, flip it over, and reinstall it with little effort to align it properly.
So the biggest design change for the big one was its vertical orientation. I expanded on the details a lot and I thought that that might be the end of it, But once I got to looking at this big thing and started thinking about how I relate to it differently since it was no longer an object I could hold in my hand, It just made much more sense to me as a vertical object rather than a horizontal one that invited you to pick it up. So I decided to do another wall mount. This photo shows all three on my desk.( the large one is horizontal for the sake of the photo only)


